Books must be loved, and to keep them longer, use bookmarks. Want to learn how to make a paper bookmark with your own hands? Check out a selection of 30 great examples of beautiful bookmarks for books with step-by-step photos. This is a fun activity for adults and a perfect craft for kids.
In addition, paper bookmarks for kids are a great way to encourage reading, as the paper bookmark will eventually find its place in the book the kids will be reading. There are so many benefits to simple crafts, so you can easily get kids interested in simple projects. For example, paper corner bookmarks are perfect to start teaching origami to kids. The crafts make a great learning project that kids can make for themselves or give to parents and other family members.
Simple Paper Bookmarks
If you’re tired of losing the pages you were on while reading or can’t find a bookmark that you like, this tutorial is for you! If you are unable to make a bookmark on your own, you can get a bookmark maker online. Here’s how to make 3 easy paper bookmarks, each one takes 10 minutes to make but looks really cool.
Paper Corner Bookmark
Choose the appropriate color paper you want to use, in this case, red. Draw 3 squares 6 x 6 cm. After that, you need to cut out the shape, as shown in the step-by-step photos. Mark the extra pieces from corner to corner and cut them.
Fold two triangles on top of each other and glue. Finally draw what you like, such as a scary monster like in the picture, and you’re done! The paper bookmark will be at the corner of the page you want to bookmark.
Patterned Paper Bookmark
Draw whatever you like on a piece of paper. To make a beautiful bookmark for a book, outline the drawing in the shape of a circle and cut it out with scissors. After that, punch a hole in the top of the circle. Pass a thread or ribbon through the hole.
Tie a knot at the end and you’re done! This bookmark idea is great because you can draw anything, for example, on the topic of the book you are reading. Just make sure the bookmark is small enough to fit in the book.
Paper Bookmark Arrow
Draw an arrow shape on the paper you will be using. Cut carefully along the outline. Fold the back of the arrow bookmark as shown in the photos. You can decorate as you like and that’s it. The great thing about this paper bookmark is that you can lay it in the book in such a way that the arrow will point to the line where you left off.
Origami Arrow Bookmark
If you like the paper arrow bookmark idea, then here is an example of how to make a more sophisticated origami arrow. To do this, you need to make a matrix – that is, in a certain sequence, make vertical and horizontal folds on a sheet of paper, and then unfold it. When such a blank is ready, you can start folding the origami arrow, as shown in the step-by-step photos. To make it look nice, make sure the paper you’re using is an even square. The paper used here is 15 x 15 cm.
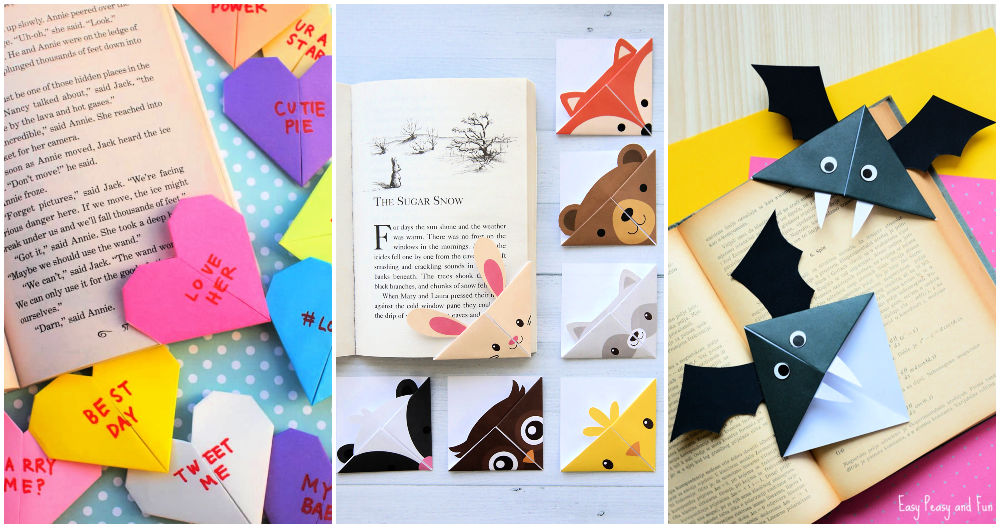
Corner Bookmark
These cute paper corner bookmarks can be made in less than 5 minutes with any square piece of paper around the house! Materials – paper, scissors, and glue. Just cut the paper into a 12 x 12 cm square. Then divide it into 4 pieces as shown in the picture.
After that, you need to cut out the part shaded with a pencil. Stack by pictures. apply glue and fold the other part. In principle, the craft is ready. Add some more details to decorate the paper corner bookmark and that’s it! You can make them in all shapes, sizes, and colors, this is the perfect gift for kids!